Instructions for Fitting Bike Seats
Bike Seat Fitting & Installation for RideOut’s seats or other bike seats
Bike seat fitting is extremely important to provide maximum comfort for the rider. Proper fitting depends also on other bike variables. Handlebar height, frame size, the type of bike (mountain, comfort, road, etc.) and even the riding terrain influence the proper fitting of all bike seats. Whether you are using one of the RideOut’s bike seats or one of the many other seats on the market today, proper adjustment is paramount.
To begin, let’s look at frame size.


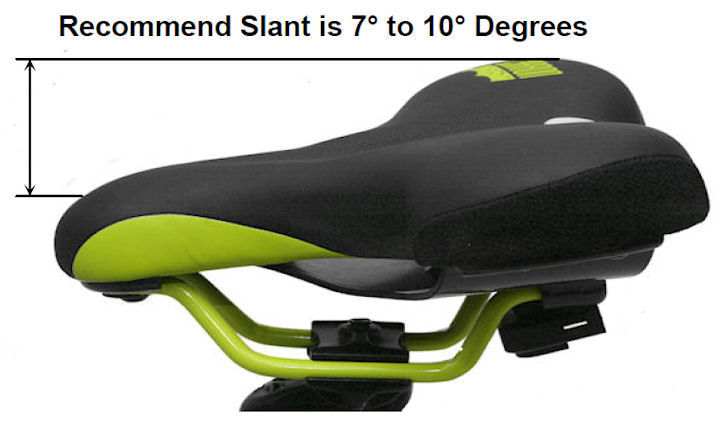
RideOut’s seats should be mounted with the horn/nose of the seat pushed as far back toward the rear of the bike as you can adjust it. For women, start with seat about 7 degrees tilted down and for men start with the bike seat level. As you ride, adjust the seat closer to the handlebars, up or down and needed. Because you are sitting on this seat, not straddling it as you do with other seats, you’ll need to position it so that the natural fold where your leg meets your behind is right on the edge of the seat. Ideal leg position for all bikes is to have the ankle directly below the hip.
All bike seats need to be tweaked and adjusted to suit the individual rider’s preferences and riding style. If you have problems or questions regarding the fitting of any of the bike seats on the market today, your local bike store is a great source for help.
Carbon Comfort Seat Adjustment
Installing a Clam Shell Mount
Installing a Single Bolt Mount
Inventing the Carbon Comfort
View Complete Written Instructions for Bike Seat Fitting & Installation
Click here to download a printer friendly PDF version.
Complete Written Instructions:
Cheap bikes seats, yep you can get them, but as the saying goes, “You get what you pay for”. However, with RideOut Bicycles seats, buy them for comfort, ride them for life.
Please remember that biking is an inherently dangerous activity. Always check your equipment before riding. We highly recommend periodically checking your seat mount and all screws and bolts before riding just as you would check tire pressure every time before you ride.
Yes, this seat looks a bit different. It may feel different too. As you mount the seat we suggest:
- This seat works best when the handlebars are equal to or higher that the height of the seat. The carbon fiber pan of this saddle makes it set about a 3/4 inch higher than a standard seat so began by lowering your seat post height 3/4 inch. The saddle is designed to set further back on the seat post than a standard seat. Try starting with the seat mounted as far back as possible. You may want to adjust the handle bars slightly up ½ inch higher as well.
- We have found in our testing that men tend to prefer the saddle level, whereas women generally like the horn slanted around 5-7 degrees down.
- As you ride, you should feel the sides flexing slightly up and down as you pedal.
- It may take some tinkering to find the correct position/angle.
- If you feel there is too much pressure on your hands, bring the seat forward on the post.
- If you feel you are sliding off, bring the seat closer to level.
- If you feel pressure from the front of the saddle on the back of your legs, slant it slightly down and bring the seat forward.
- Try sitting up you as you ride, move a bit back and forth on the seat to place the very top of your legs at the very forward edge of the seat.
- This is a different feel and will take a few minutes to get used to the feeling. Ride a mile and put your old seat back on. Ride again. This is where most people are convinced this seat design is a better one for them.
Please feel free to contact us regarding any questions or concerns you may have regarding the line Carbon Comfort Seats, we will be happy to assist you!
